AJS Furniture AJS Furniture

Top 10 Tips for Measuring Custom Wardrobe Inserts

Time:2026-11-05 Author:Mason
0%

A wardrobe opening may look perfectly square, but walls, floors, and ceilings often have other ideas. A small difference can affect whether drawers slide smoothly or shelves fit without awkward gaps. This guide explains How to measure for custom wardrobe inserts with clear, practical checks you can make at home. You will need a tape measure, a pencil, and a notepad. A second person can help keep the tape straight. Still, double-check every reading yourself.

Measure the opening in several places, not just once. Record the width near the top, middle, and bottom, then use the narrowest measurement as a cautious starting point. Measure the height on both sides and in the center. Check the available depth, too, including any skirting boards, hinges, pipes, or door tracks that may intrude. Small details matter. Note whether doors need room to swing or slide, and write down measurements in one consistent unit. Before ordering, compare your figures with the insert maker’s measuring instructions; fitting allowances can vary by product. Photos and a simple sketch can make unusual corners easier to explain. One thing is easy to overlook: a sloping floor or bowed wall may not show clearly in a quick glance. It may take another check. These ten tips help you spot such issues early, reduce avoidable ordering errors, and give a supplier useful information. Measure carefully, but leave room for uncertainty when the opening is irregular.
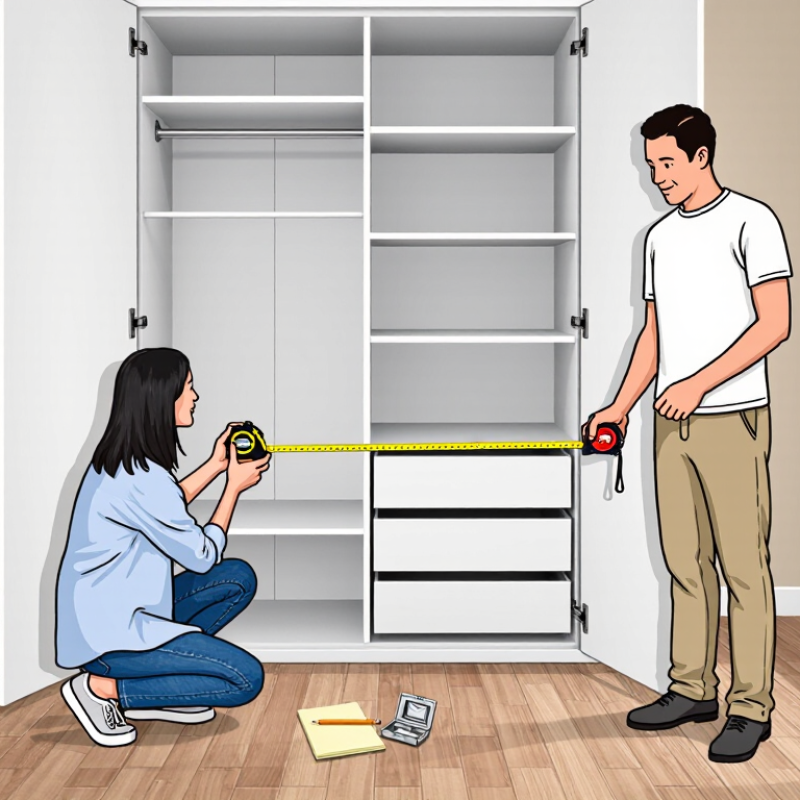
Top 10 Tips for Measuring Custom Wardrobe Inserts

Measure Width at Three Points to Reveal Out-of-Square Walls

For a custom wardrobe insert, measure the opening width at the top, middle, and bottom. Keep the tape level and use the same side-to-side reference each time. Record every reading instead of relying on one measurement. Small differences matter. A leaning wall or uneven floor can make the opening narrower near one corner.

Compare the three numbers. A gradual change may indicate a sloping side. A sudden difference could come from trim, a wall bump, or bowed plaster. Check that the tape stays straight and does not sag across the opening. Measure twice. Use the narrowest reading as a cautious starting point, then share all three measurements with the person planning the insert.

Note where each measurement was taken; a quick sketch can make the shape easier to understand. Measure from the finished surfaces that will frame the insert, not from loose paint or removable trim. A reading can still be wrong, even with care. It is better to admit uncertainty and recheck than to order from one rushed number and discover a tight fit or visible side gap.

Top 10 Tips for Measuring Custom Wardrobe Inserts: Measure Width at Three Points to Reveal Out-of-Square Walls

Illustrative example: measure the wall width near the top, at the middle, and near the bottom. The readings below show how width can vary along the same wall.

What it means: In this example, the 1-inch difference between the widest and narrowest readings indicates the wall is not parallel. Record all three measurements and use the narrowest width when planning the insert, allowing for the required fitting clearance.

Record Height at Both Sides and Center Before Sizing Inserts

Measure the opening at the left, center, and right, from the finished floor to the underside of the top. Write down all three readings, even if they look identical. A sloping floor or bowed shelf can change the usable height by several millimeters. Repeat each measurement once. Small differences matter.

The U.S. Census Bureau’s 2023 American Housing Survey places the median year of construction for U.S. homes around 1979. In older spaces, settlement and past repairs can leave closet openings slightly out of square. Don’t size an insert from the tallest reading. Use the shortest clear height as your starting point, then check the insert maker’s required fitting clearance. A laser measure helps, but confirm with a steel tape; angles and dark corners can affect readings. Measure with trim and flooring in place. If one number seems odd, check it again. It is tempting to average the three heights, but that can hide a tight spot and leave the insert rubbing overhead. Keep the notes with a sketch of the opening. A quick sketch saves confusion later.

Compare Usable Depth with the NKBA 24-Inch (610 mm) Closet Benchmark

The NKBA’s 24-inch (610 mm) closet-depth benchmark is a useful reference for hanging garments. It is not a promise that every insert will fit. Measure clear depth from the finished back wall to the nearest front obstruction. Count door panels, hinges, trim, and sliding tracks. Small losses matter.

Take measurements at the floor, waist height, and near the top; walls and wardrobes can taper. Record the shallowest reading. Then check whether drawers can open and hangers clear the closed doors. An insert measuring exactly 24 inches may still rub against a track or uneven wall. That happens. Measure separately with hinged doors open and closed if their swing enters the storage space.

For shelves, usable depth can be less than the hanging benchmark, depending on stored items and access. Try a cardboard template at the planned insert depth. Close the doors, pull out a drawer, and look for contact points. Leave some tolerance where surfaces are not square; the exact allowance depends on the fitting system. A second measurement is boring, but cheaper than a remake.

Top 10 Tips for Measuring Custom Wardrobe Inserts — Compare Usable Depth with the NKBA 24-Inch (610 mm) Closet Benchmark

# Measurement Tip How to Measure What to Record or Check
1 Measure usable depth, not just the closet opening. Measure from the finished back wall to the nearest front obstruction, such as a closed door, track, or frame. Record the clear usable depth in inches and millimetres. Compare it with the 24 in (610 mm) closet-planning benchmark; do not assume a nominal 24 in cabinet provides 24 in of clear space.
2 Take depth readings at several heights. Measure near the floor, at the planned shelf or rod height, and near the top of the insert. Record each reading. A baseboard, sloped wall, or other obstruction may make the available depth vary from bottom to top.
3 Check width at three points. Measure the opening at the top, middle, and bottom, between the finished side surfaces. Use the smallest reading when planning a fitted insert, and note any trim or door casing that reduces the opening.
4 Check ceiling height and floor level. Measure from the finished floor to the ceiling at the left, centre, and right of the installation area. Record the lowest height. Note uneven floors, sloped ceilings, and any skirting that affects the insert’s fit.
5 Account for doors and their hardware. With the door in its normal closed position, identify how much space the door leaf, hinges, handles, or sliding tracks occupy. Record any intrusion into the usable depth or width. Check that drawers and pull-out accessories can open without colliding with the door.
6 Locate fixed obstructions. Measure the position and projection of pipes, outlets, switches, vents, beams, and other items inside or beside the closet. Record each obstruction’s distance from the floor, back wall, and nearest side wall so shelves and panels can be planned around it.
7 Plan hanging space around the garments. Measure the clear depth available behind the closed door and check it against the clothing and hangers you intend to store. The 24 in (610 mm) benchmark is a useful planning reference, not a guarantee that every garment will clear every door or insert. Allow for bulky clothing and movement.
8 Measure the space needed for drawers and pull-outs. Measure the insert depth and the clear floor area in front of it; check the full extension path of each drawer or basket. Record the projection of the open accessory and confirm that it will not hit a door, bed, or walkway obstruction.
9 Use consistent units and label every measurement. Write each dimension as width × height × depth and mark the location where it was taken. Use either inches or millimetres throughout, or show both: 24 in = 609.6 mm, commonly rounded to 610 mm.
10 Verify measurements before ordering or installation. Repeat critical measurements and compare them with a simple sketch showing walls, doors, obstructions, and insert components. Confirm the final clear opening and usable depth on site. Follow the insert manufacturer’s installation clearances where applicable.

Benchmark note: The 24 in (610 mm) figure is a common closet-planning reference associated with NKBA guidance; it is not a universal building-code requirement. Actual usable depth depends on the finished walls, doors, hardware, and insert construction.

Check Hanger Fit Against Typical 17–18-Inch (432–457 mm) Widths

A hanger’s stated width is only a starting point. Many adult hangers measure about 17–18 inches (432–457 mm) across, but shapes vary. Measure the widest hanger you actually use, from tip to tip, and compare it with the insert’s clear interior width—not its outside dimensions. Leave a little side clearance so hooks and shoulders do not scrape the panels. An inch of extra room can help, though bulky coats may need more.

Check the space at several heights. Shelves, trim, drawer fronts, and a slightly uneven wall can narrow the opening in ways a single measurement misses. Hold a hanger inside the wardrobe and turn it gently, especially if the doors slide or the hanging rail sits near a side panel. Try it with a jacket, too. Sleeves can extend beyond the hanger.

Small details matter. A lot. Record the narrowest clear width, then recheck it before ordering or cutting an insert. If your measurements differ by even a fraction, pause and measure again; custom work leaves less room for guesswork. My own tendency would be to trust the first reading, but that is exactly the one worth questioning.

Account for Door, Trim, and Hardware Clearance in Final Dimensions

Measure the opening at the top, middle, and floor; walls rarely stay perfectly square. Record the smallest width and height, then check the floor for slope. Include the actual door swing, not just the opening. A hinged door may hit a pull, drawer front, or nearby wall before it reaches its full arc. Slide the door through its complete travel and note the closest point.

Small gap, big difference.

Measure trim depth and projection, including corner blocks and uneven casing. Then measure hardware from its mounting surface to its outermost edge. For hinges, account for the knuckle and door thickness; for handles, check both the pull’s projection and the space your fingers need.

The USDA Forest Products Laboratory’s Wood Handbook (FPL-GTR-282) reports that wood movement varies by grain direction, with tangential movement often about twice radial movement. This matters most where solid-wood doors or trim meet fitted inserts; leave room for seasonal movement rather than forcing a tight fit.

Confirm clearances with the actual doors and hardware before ordering. I have learned that a neat sketch can still miss a protruding hinge.

Recheck the tightest corner.

FAQS

Where should I measure a wardrobe opening’s width?

Measure across the top, middle, and bottom. Keep the tape level and use the same side-to-side reference. Record all three readings.

Which width should guide a custom insert?

Use the narrowest reading as a cautious starting point. Share every measurement and note where each was taken. Recheck if numbers differ.

What can cause different width readings?

A sloping wall, uneven floor, trim, or bowed plaster can change the opening. A quick sketch helps show the shape.

How much clear depth is useful for hanging clothes?

About 24 inches (610 mm) is a common reference for hanging garments. Measure from the finished back wall to the nearest obstruction.

What should I include when measuring wardrobe depth?

Count tracks, hinges, door panels, and trim. Measure near the floor, waist, and top, then use the shallowest reading.

How can I check whether a drawer will clear the doors?

Test the planned depth with a cardboard template. Close the doors, pull out a drawer, and look for contact. Simple, but useful.

How wide are typical adult hangers?

Many measure about 17–18 inches (432–457 mm), but shapes vary. Measure your widest hanger from tip to tip.

How do I make sure hangers will fit inside the insert?

Compare the hanger width with the insert’s clear interior width, not its outside dimensions. Try a jacket inside, and turn the hanger gently. Sleeves can stick out. I might trust my first measurement, but it deserves a second look.

Conclusion

How to measure for custom wardrobe inserts begins with checking the space in several places rather than relying on a single measurement. Record the closet’s width at the top, middle, and bottom to identify walls that are not square, then measure the height on both sides and through the center. Use the smallest relevant dimensions when planning the inserts, allowing for uneven surfaces and a practical installation fit.

Next, compare the usable depth with a common closet reference of 24 inches (610 mm), and make sure hanging sections can accommodate typical hanger widths of 17–18 inches (432–457 mm). Before finalizing the dimensions, account for anything that takes up space or could obstruct movement, including doors, trim, handles, and other hardware. Careful measurements and clearance checks help ensure the inserts fit the available space and remain easy to use.

Mason

Mason

Mason is a seasoned marketing professional with a deep expertise in the company's offerings and a passion for driving brand awareness. With a strong background in digital marketing strategies, he has an innate ability to connect with diverse audiences and effectively communicate product benefits.......