AJS Furniture
Noise can make a comfortable room feel exposed, whether it comes from hallway voices, traffic, or a neighbor’s television. Wall panels can help, but their limits matter. Most acoustic panels absorb reflections inside a room; they do not automatically stop sound passing through walls. That distinction is easy to miss. How to soundproof a room using wall panels depends on the noise source, the wall’s construction, and gaps around doors and outlets. A thin foam sheet may soften an echo, while dense, well-fitted layers can contribute more meaningfully to sound isolation. But installation details matter.
Before choosing a panel, identify whether you hear sharp speech, low bass, or reverberation; each points to a different problem. Check for hollow doors, unsealed edges, and shared vents, since sound often finds the easiest route. This guide compares seven practical approaches, from fabric-wrapped absorbers to layered panel systems and carefully sealed edges. It explains where each option works, what materials to consider, and when professional advice may be worthwhile. No panel fixes every room. A modest improvement is still useful. Expectations should stay realistic: meaningful sound isolation may require added mass, airtight sealing, or changes beyond the wall surface. Measure results in the same spot and at similar times, rather than trusting a product label alone. Small rooms can behave oddly. That part deserves a second look.
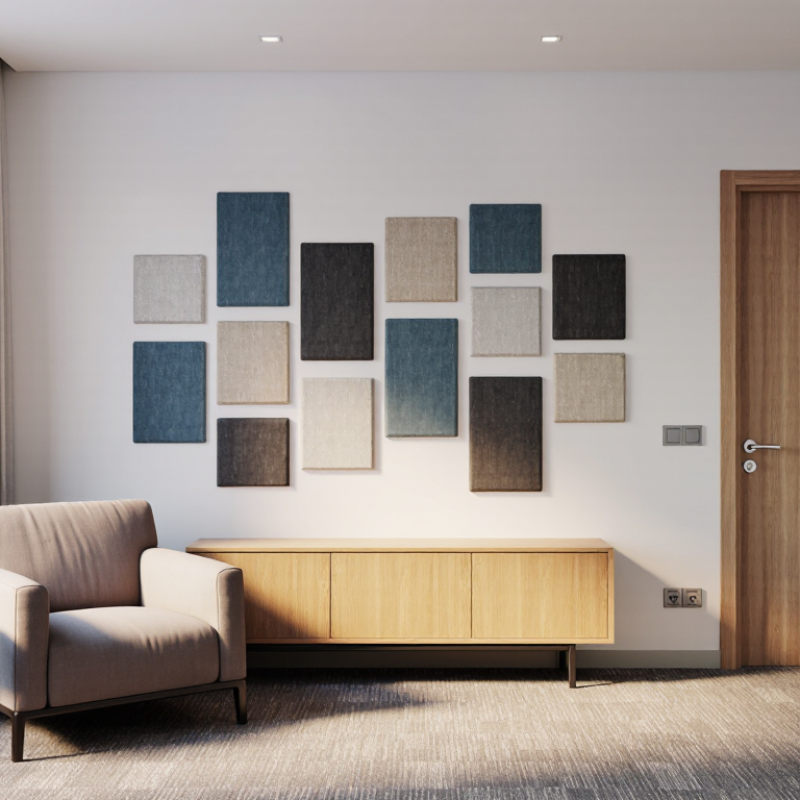
Before adding wall panels, identify what you hear and where it enters. Traffic usually comes through windows, while voices may pass through a shared wall or gaps around a door. Footsteps and chair scrapes are impact noise, which wall panels alone rarely stop. Listen in the room at different times, with heating or ventilation switched off when practical. Note whether the sound is sharp, low, steady, or intermittent. A phone recording can help compare locations, but it is not a reliable sound-level measurement.
Tips: Check door edges, window seals, outlets, and the junctions between walls and ceilings. Hold a strip of tissue near a suspected draft; movement can reveal an air leak. This test is imperfect, but it gives you a useful clue.
Pay special attention to corners and the wall facing the loudest source. A bare, hard wall may make speech and music echo, while a visible gap may let outside noise through. These are different problems. Absorptive panels can soften reflections inside the room, but they do not seal openings or add much sound blocking by themselves. I would map the weak points before buying anything; it is easy to cover a large wall and miss the narrow gap that matters more.
Choose panels by the sound you hear, not by appearance. Echoes from conversation or television call for absorptive panels with a tested Noise Reduction Coefficient (NRC). ASTM International’s C423 test measures how much sound a material absorbs in a reverberant room. A higher NRC can help tame reflections, but it does not mean the panel blocks noise from next door.
Different problem. For voices, barking, or traffic coming through a wall, absorption alone is rarely enough. Look for the wall’s Sound Transmission Class (STC), commonly rated using ASTM E413, and inspect the full wall assembly—not just the panel. Gaps around outlets, doors, and trim can undermine results. A thin decorative panel may make a room sound calmer while leaving the neighbor’s television clearly audible.
Check the noise pattern before buying. WHO’s 2018 Environmental Noise Guidelines recommend road-traffic exposure below 53 dB Lden and 45 dB Lnight; these are health-based outdoor guidelines, not promises of indoor quiet. Still, they show why persistent traffic deserves more than soft furnishings. Record when the noise peaks, then test a small area if possible. I would be cautious about any claim that one panel solves every sound problem. That distinction matters.
Choose panels and related treatments according to the noise you need to reduce. The chart shows approximate frequency ranges commonly associated with different noise sources; actual ranges vary.
Frequency ranges are broad guides, not measurements of loudness or sound reduction. Absorptive wall panels can reduce echo and reverberation inside a room, but usually do not block sound transmission on their own.
Before installing wall panels, inspect the wall in daylight and with a flashlight held at an angle. Light can reveal hairline cracks, lifted trim, and gaps around pipes or window frames. Even a narrow opening may let sound leak through. Mark each spot with painter’s tape so you can find it again.
Seal suitable cracks and gaps with flexible acoustic sealant, following the product directions. Use care around electrical outlets and switches; never pack them with sealant or cover ventilation openings. A common mistake is treating every gap the same. Some openings need a proper repair, not a quick bead of caulk. If you are unsure what is behind a wall, pause before drilling or filling.
Clean the surface with a dry cloth, remove loose paint, and repair dents so panels can sit flat. Let any patching compound dry fully. Check that the wall is not damp, since trapped moisture can loosen adhesive or damage finishes. It is tempting to rush this part. I would not. Mark studs and check for hidden cables or pipes before fastening panels. Remember, panels can reduce echo inside a room, but sealing gaps and preparing the wall do not make them a complete barrier to outside noise.
Wall panels can make a room sound calmer, but they rarely block traffic or loud voices passing through a wall. They mainly absorb reflections inside the room. Map the first reflection points by listening as someone speaks or claps nearby. Position panels at those spots, then cover a useful area rather than creating one narrow decorative strip. Choose thick, porous panels for stronger absorption, and leave a small air gap behind them when practical.
Treat upper corners with bass-absorbing panels if low notes linger. Arrange panels across the listening area instead of clustering every piece behind a sofa. Stagger their edges to avoid leaving one bare vertical strip that keeps reflecting sound. These adjustments can reduce echo, though the room may still feel imperfect. That is normal; hard floors and windows continue to reflect sound.
For noise coming through a shared wall, use panels as part of a heavier, well-sealed wall assembly. Seal gaps around edges and outlets with suitable materials, and avoid assuming a soft panel alone will stop sound transmission. A panel can look substantial yet offer little isolation. Check the result by listening from the same spot before and after installation, preferably with the room furnishings unchanged.
Choose a strategy based on the noise source and the room’s construction. Absorptive panels can reduce reflections and echo, but reducing sound transmission between rooms usually requires sealing gaps and adding mass or structural isolation.
| # | Strategy | Panel or Material | Best Placement | Most Helpful For | Practical Notes |
|---|---|---|---|---|---|
| 1 | Install fabric-wrapped acoustic panels | Porous panels made with fiberglass or mineral wool and a breathable fabric cover | At first-reflection points on side walls and on the wall opposite speakers | Reducing speech echo, room reverberation, and reflected sound | These panels absorb sound inside the room; they do not, by themselves, block much noise passing through a wall. Follow the panel maker’s fire-safety and mounting instructions. |
| 2 | Use thicker panels or add an air gap | Typically 2–4-inch (about 5–10 cm) porous panels, mounted directly or spaced off the wall | Across the main reflective wall areas | Broadband echo control, especially in rooms with hard surfaces | Greater thickness and a small air gap can improve absorption at lower frequencies compared with a thin panel mounted flat, though performance depends on the panel and frequency. |
| 3 | Cover a larger, measured wall area | Multiple matching absorptive panels arranged in a planned layout | Prioritize reflection points, then add coverage where the room still sounds reverberant | Reducing overall room reflections without covering every wall | Start with the most reflective locations and listen again before adding more panels. Excessive absorption can make a room sound unnaturally dull. |
| 4 | Add corner bass traps | Deep porous panels or purpose-made corner absorbers | Vertical room corners, especially where bass sounds uneven or boomy | Low-frequency buildup and bass ringing inside the room | Low-frequency control generally requires greater depth than ordinary thin wall panels. Bass traps improve room acoustics but do not replace sound isolation. |
| 5 | Seal gaps before adding finish panels | Acoustic sealant around suitable joints; compatible gaskets or seals around openings | Wall edges, trim joints, and openings where air can pass through | Airborne noise leaking through small cracks and unsealed gaps | Inspect first and use materials appropriate to each joint. Do not seal required ventilation openings, electrical equipment, or fire-safety features. |
| 6 | Build a heavier wall layer behind the panels | An additional layer of gypsum board, with joints offset from the existing layer | Over the wall facing the main noise source, as part of a properly detailed assembly | Improving airborne-noise isolation when the existing wall is lightweight | Added mass can help, but results depend on the entire wall assembly, perimeter sealing, and flanking paths. Check structural capacity and local fire requirements before construction. |
| 7 | Decouple the new wall surface where needed | Resilient channels or isolation clips with a new gypsum-board layer; decorative panels can be added afterward | On a wall shared with a noisy room, installed as a complete system | Reducing vibration transfer through a shared wall | Correct spacing, fasteners, and perimeter details are essential. Screws that bridge the isolated layer to the framing can reduce the benefit; professional installation may be appropriate. |
Soundproofing panels absorb reflections; they rarely block sound passing through walls. To judge their effect, record the room before installation and after. Use the same sound source, volume, microphone position, and room setup each time. A sound-level meter is more dependable than a phone, though either can help track changes.
Check reverberation, not just loudness. ANSI/ASA S12.60-2010 sets a reverberation-time limit of 0.6 seconds for smaller unoccupied classrooms and 0.7 seconds for larger ones. These are classroom benchmarks, not universal home targets. Still, they show why a shorter echo can matter. Clap once near the room’s center, then listen for a lingering tail. Better yet, use an RT60 measurement tool and compare readings from the same spots.
Adjust panels where reflections are strongest: opposite bare walls, near a desk, or beside a hard window. Move one panel at a time, then repeat the test. Small changes matter. If speech sounds clearer but outside traffic remains, the panels are reducing room echo, not sealing the wall. I once expected a dramatic result from one corner; it barely changed the readings. That was a useful reminder to test placement instead of guessing.
They absorb sound reflections inside a room. Speech may sound clearer, but traffic can still pass through the wall.
Listen while someone speaks or claps. Place panels at strong reflection points, such as opposite bare walls or beside a desk.
Thick, porous panels generally absorb more. A small air gap behind them may help when practical.
No. Spread them across the listening area and stagger their edges. This helps avoid a bare vertical strip that keeps reflecting sound.
Bass-absorbing panels in upper corners may help when low notes linger. They may not solve every low-frequency problem.
Not by themselves. A heavier, well-sealed wall assembly is more relevant. Seal suitable gaps around edges and outlets.
Record the room before and after using the same sound, volume, microphone position, and furnishings. A sound-level meter is more dependable than a phone.
It may indicate long reverberation. Smaller unoccupied classrooms have a 0.6-second benchmark; larger ones use 0.7 seconds. These are not universal home targets.
Clap near the room’s center or compare RT60 readings. Move one panel at a time. I once expected one corner panel to change everything; it barely shifted the readings.
How to soundproof a room using wall panels begins with understanding where unwanted noise enters and what kind of sound needs to be reduced. Check walls, corners, outlets, doors, and other weak points, then choose panels suited to the problem, such as reducing echoes inside the room or helping limit sound passing through walls. Before installation, seal small gaps and prepare clean, stable surfaces so the panels can sit securely.
Seven practical wall-panel strategies can then be applied, combining thoughtful panel placement with suitable coverage across the most affected areas. Arrange panels to address key reflection points and noisy sections rather than relying on appearance alone. Once installed, listen from different parts of the room and compare the results with the original noise conditions. If sound still reflects or enters through a particular area, adjust panel positions or add coverage where it will make the greatest difference.