AJS Furniture
A deep pantry cabinet can hold a surprising amount of food, cookware, and household supplies. It can also hide expired cans behind half-used flour bags. Learning How to organize a deep pantry cabinet efficiently starts with seeing the cabinet clearly, not buying more containers.
In my experience, the best results come from removing everything first. Place items on a clean table or counter. Check expiration dates, damaged packaging, and duplicate products. Wipe each shelf, especially the back corners where crumbs and dust collect. Measure the cabinet’s height, depth, and usable width before choosing organizers. Small mistakes here can make expensive bins useless.
Keep everyday foods near the front, such as breakfast cereal, rice, pasta, and snacks. Store backup items behind them only when the products remain visible. Pull-out drawers, sturdy risers, and clear labeled bins can reduce forgotten supplies. Group foods by purpose, but stay flexible. Baking ingredients may need a separate zone from canned vegetables. Heavy items belong on lower shelves, while lighter packages can sit higher.
Do not chase a perfect pantry.
A system that looks attractive may still feel frustrating during busy evenings. I once arranged identical jars neatly, then discovered they slowed down cooking. That failure was useful. Your routine matters more than a picture-perfect shelf. Review the cabinet every few months, adjust difficult areas, and record what repeatedly gets lost. Reliable organization should save time, support safer food storage, and remain easy for every household member to maintain.
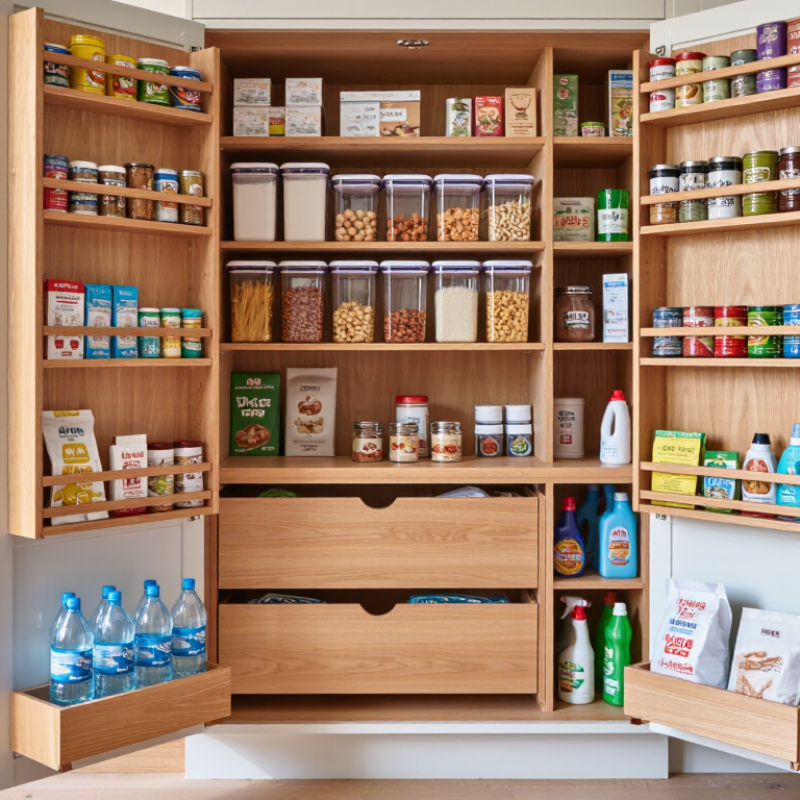
A deep pantry cabinet can hide more than it stores. Begin by measuring its width, height, depth, and door clearance. Record the usable depth behind the hinges. A shelf may measure 24 inches deep, but the rear 10 inches can become difficult to reach. Check the floor and shelf strength before loading heavy containers. A small light also reveals dark corners and forgotten spills.
Study how your household uses the pantry for one week. Note which foods need daily access, such as cereal, rice, snacks, and cooking oil. Keep these items between waist and shoulder height. Store heavier jars on lower shelves. Place occasional baking supplies higher, but only where they remain safely reachable. Group foods by use instead of forcing every item into a perfect category. It saves searching time.
Accessibility matters more than maximum capacity. Use shallow bins or sliding shelves for items stored deep inside. Leave a few inches of clearance so containers can move without scraping. Tall packages should stand upright, while short cans can sit in stepped rows. My first arrangement looked tidy, but I filled the front too heavily and forgot the back. That mistake taught me to leave visible gaps and label only containers that truly need identification. Recheck the cabinet after several days. Real habits often challenge the neat plan.
A deep pantry becomes difficult when forgotten items hide behind newer purchases. I start by removing every item, including cans, opened packets, and containers on the floor. Clear shelves first. Place food on a clean counter, then inspect each package for leaks, pests, damage, and expiration dates. Do not rely on smell alone. Some unsafe food looks normal. I check storage instructions and discard anything questionable according to local food-safety guidance.
Next, I sort items by use rather than package shape. Grains, canned vegetables, baking supplies, snacks, breakfast foods, sauces, and unopened reserve items each receive a category. I place opened foods in sealed containers and write the opening date on removable labels. Similar products stay together, while duplicates move into a separate “use soon” group. This step exposed three forgotten pasta packets in my own cabinet. I had overbought because the deep shelves made the back invisible.
For efficient placement, I keep heavy cans and jars on the lowest shelf. Everyday foods sit at eye level, and rarely used supplies go higher. Narrow bins, shelf risers, and pull-out trays make the back reachable without unloading everything. Keep it visible. Labels should face forward, even when the cabinet is crowded. Leave some space. A completely packed shelf looks efficient but usually creates waste. My first arrangement was too strict, so I adjusted categories after observing what my household actually used for two weeks. Organization should support real habits, not an ideal routine.
A practical removal, sorting, categorization, and storage plan for deep pantry cabinets
| Step | Pantry Category | Typical Items | Remove or Keep Rule | Best Storage Position | Recommended Container | Inventory Limit | Review Frequency |
|---|---|---|---|---|---|---|---|
| 1. Remove | Expired or spoiled food | Moldy items, leaking packages, swollen cans, insect-damaged food | Discard immediately. Do not taste food to check whether it is safe. | No storage | Separate waste and recycling bags | None | At every pantry reset |
| 2. Remove | Unwanted duplicates | Multiple open bags, excess canned goods, duplicate baking ingredients | Keep the newest unopened item only when the older item is already sufficient. | Donate or move excess stock out of the pantry | Donation box or labeled overflow bin | One backup per frequently used item | Monthly |
| 3. Sort | Grains and dry staples | Rice, pasta, oats, flour, cornmeal, couscous | Keep dry, sealed, and clearly dated. Move opened products to airtight containers. | Middle shelves within easy reach | Airtight, food-safe containers with labels | One active package plus one backup | Every 4 weeks |
| 4. Sort | Canned and jarred foods | Beans, vegetables, fruit, sauces, soup, stock | Reject cans with severe dents, rust, leaks, bulges, or damaged seals. | Lowest sturdy shelf; heavy items stay low | Shallow pull-out bins or tiered risers | Two to four weeks of normal use | Monthly |
| 5. Categorize | Breakfast foods | Cereal, granola, pancake mix, spreads, dried fruit | Group foods used at the same time and place daily-use items at the front. | Eye-level shelf | Open-front bin or cereal container | One open package per food type | Weekly |
| 6. Categorize | Baking ingredients | Sugar, cocoa, baking powder, baking soda, yeast, extracts | Check freshness dates and keep moisture-sensitive powders tightly sealed. | Upper-middle shelf, away from heat | Small airtight containers inside a handled bin | One container per ingredient | Every 3 months |
| 7. Categorize | Snacks | Crackers, popcorn, nuts, bars, dried snacks | Remove stale or opened items that are no longer appealing to the household. | Lower-middle shelf for easy access | Labeled open bin with a “first to eat” section | One small bin per snack group | Weekly |
| 8. Categorize | Spices and seasonings | Dried herbs, spice blends, salt, pepper, bouillon | Combine duplicates where safe and discard items with weak aroma, moisture, or contamination. | Shallow upper shelf or door rack | Tiered spice riser or narrow drawer organizer | One active container per seasoning | Every 6 months |
| 9. Arrange | Oils, vinegar, and liquid sauces | Cooking oil, vinegar, marinades, soy-style sauces, hot sauces | Wipe sticky bottles and check caps, leaks, sediment, and unusual odors. | Lowest or middle shelf in a spill tray | Water-resistant tray with upright dividers | One active bottle plus one backup | Monthly |
| 10. Maintain | All categories | New purchases and opened packages | Use FIFO: place older items in front and newer items behind. Label opened dates when useful. | Front-to-back rows with a clear walkway to the rear | Pull-out bins, lazy Susan trays, shelf risers, and labels | No item hidden behind another row | Quick reset weekly; full reset quarterly |
A deep pantry cabinet works better when every shelf has a clear purpose. I divide mine into three zones: food types, household supplies, and frequently used products. This prevents cans from hiding behind baking ingredients. It also makes restocking less frustrating.
I keep grains, pasta, canned food, and snacks in separate sections. Tall containers stand at the back, while short items stay near the front. A shallow pullout bin can bring back-row products within reach.
For supplies, I use one shelf for paper goods, cleaning cloths, and sealed storage bags. These items stay away from food. Frequently used products belong between waist and eye level. That small change saves time every day.
Labels should name the category, not every individual item. “Breakfast” is more flexible than naming one cereal. I check expiration dates during monthly restocking and move older food forward. It is a simple habit.
Still, my system is not perfect. Some packages refuse to stack neatly, and seasonal items often interrupt the zones. Instead of forcing them into a crowded shelf, I leave a small adjustment area. I measure what I actually use for two weeks, then change the layout. A pantry should support real routines, not look untouched.
A deep pantry can store a surprising amount, but hidden items often become wasted money. Visibility comes before capacity. Measure the cabinet opening, interior depth, height, and door swing before buying organizers. These dimensions determine whether shelves can slide out fully. Leave a small clearance around moving parts to prevent scraping and sticking.
Choose sturdy pull-out drawers for cans, jars, and boxed food. Full-extension shelves let you see items at the back without kneeling or reaching blindly.
Adjustable dividers can separate snacks, grains, and baking supplies. Keep heavy containers on lower levels, where they are safer to lift. Use shallow bins for small packets, since deep baskets can recreate the same hiding problem.
Label each section with large, readable words. Store newer food behind older items, then check dates during monthly restocking.
I once placed tall containers in front of shorter ones, and the arrangement looked tidy but failed in daily use. That mistake taught me to test reach, not appearance.
A loaded shelf should slide smoothly with one hand. If it does not, remove excess weight or choose stronger hardware. Leave a little empty space, too. A completely full cabinet quickly becomes difficult to maintain.
A deep pantry becomes difficult when labels disappear behind cans and bags. I label every container with the food name, opening date, and use-by date. Large, readable writing works better than decorative labels. For flour, rice, and cereal, I also record allergen information when needed.
Food-safety guidance recommends keeping dry goods sealed, cool, and dry. I follow that advice, although I sometimes forget to update a date.
Arrange food by purpose, not only by height. Keep everyday items at eye level, such as oats, pasta, and canned vegetables. Place heavier jars on lower shelves to reduce tipping and strain.
Use shallow bins for small packets, so nothing hides at the back. A narrow riser can lift rear cans into view.
Leave a few centimeters between groups. Crowded shelves defeat the system.
My first layout looked tidy but failed after one busy week. I could not see duplicate purchases, and an old packet stayed behind a new one.
Now I use the first-in, first-out method: older items move forward, while newer items go behind them.
Once a week, I check dates, damaged packaging, spills, and unusual odors. Every month, I remove everything from one shelf and wipe it fully dry.
This takes longer than expected. Still, the brief inspection reveals what labels and neat rows cannot.
Measure width, height, interior depth, and door clearance. Check usable space behind hinges. A 24-inch shelf may hide its rear 10 inches.
Keep cereal, rice, snacks, and cooking oil there. These items need daily access. Visibility matters.
Place heavy jars on lower shelves. Check shelf strength first. A loaded shelf should not bend or feel unstable.
Use shallow bins or full-extension pull-out shelves. Leave a few inches of clearance. Containers should move without scraping.
Create sections for grains, pasta, canned food, snacks, and baking supplies. Keep household supplies away from food. Group by use, not perfection.
Move older packages forward during monthly restocking. Place newer food behind them. Check expiration dates regularly.
Label categories such as “Breakfast” or “Baking.” Avoid labeling every item. Flexible labels survive changing habits better.
Load it and slide it with one hand. Test reach, not appearance. My first tidy arrangement failed.
Leave a small adjustment area for awkward or seasonal items. Do not force crowded shelves. Real habits may change the plan.
Add a small light and leave visible gaps. These details reveal spills and forgotten packages. The system will not stay perfect.
Learning How to organize a deep pantry cabinet efficiently begins with assessing the cabinet’s dimensions, shelf depth, storage capacity, and accessibility challenges. Remove every item, check expiration dates, and sort products into clear categories such as grains, canned foods, snacks, baking ingredients, cooking supplies, and household necessities. This process eliminates clutter and reveals which items require the easiest access.
Next, create practical zones based on food types, supplies, and frequency of use. Place everyday products at eye level or near the front, while reserving higher or deeper areas for occasional items. Use sturdy risers, pull-out baskets, stackable containers, and clear bins to improve visibility and reach without overcrowding the space. Finish by labeling containers and shelves, arranging items with labels facing outward, and keeping similar products together. A simple monthly review can help remove expired goods, restore misplaced items, and maintain an efficient pantry over time.
