AJS Furniture
How to transition wall panels between rooms is a practical design question, not merely a finishing detail. A doorway may join two colors, textures, thicknesses, and lighting conditions. If the junction is poorly planned, edges can chip, shadows can look accidental, and movement may open a visible gap.
Recent market reports from Grand View Research and Fortune Business Insights identify continued growth in decorative wall panels, driven by renovation, acoustic performance, and faster installation. That growth creates more mixed-material interiors. The 2023 Architectural Woodwork Standards also emphasize controlled joints, consistent reveals, and accurate site measurements. These principles matter when one panel system meets another.
“Less is more,” said architect Ludwig Mies van der Rohe. His principle suits this problem. A transition should often be quiet, aligned, and easy to maintain. Experienced installers usually begin at the room junction, not the far wall. They compare panel thicknesses, locate studs, confirm corner conditions, and allow the manufacturer’s recommended expansion space. A slim shadow gap, matching trim, or deliberate feature strip can hide minor differences without pretending they do not exist.
That sounds simple.
It is not always.
The floor may be uneven. Door casings may be out of square. Existing walls can shift slightly over time. For that reason, this guide will examine practical layouts, trim choices, adhesive limits, and visual alignment. Some solutions look excellent in photographs but fail beside a busy doorway. The best transition is the one that survives touch, cleaning, changing daylight, and ordinary installation imperfections.
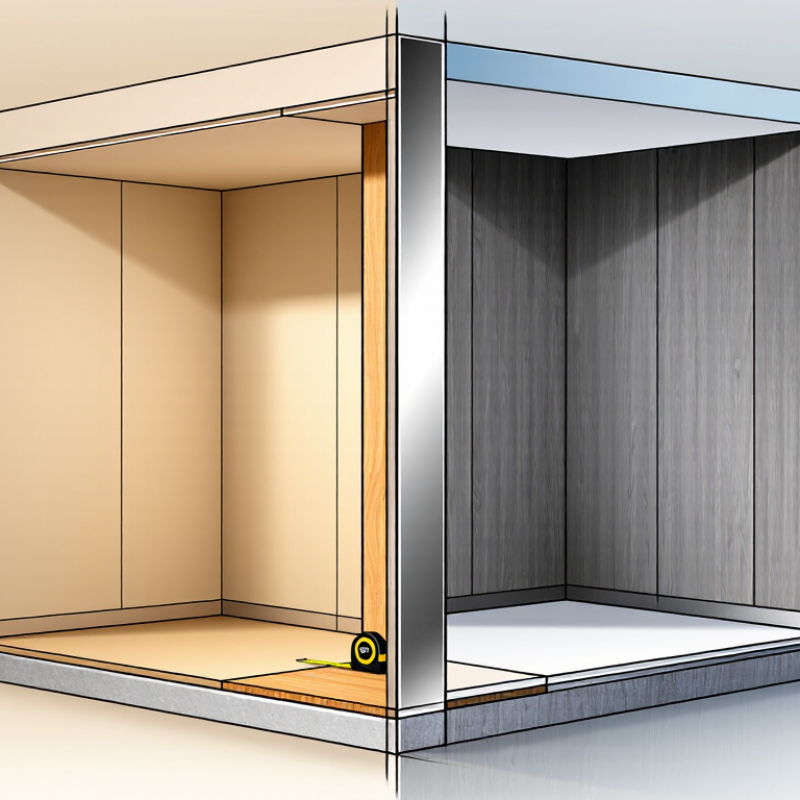
A successful wall panel transition starts with accurate room-to-room alignment. Measure door openings, corner positions, ceiling heights, and existing trim before ordering materials. A continuous vertical joint can connect two rooms visually, but only when both walls share a reliable reference line. Otherwise, the pattern may drift beside the doorway.
The 2024 Houzz & Home Study reports that 84% of renovating homeowners hire professional help. This reflects the value of careful planning, especially around complex transitions. Extend the layout drawing across both rooms, then mark panel widths at every opening. Keep major seams away from eye-level fixtures when possible. Match horizontal lines across connected spaces, but do not force symmetry where walls differ. I have seen attractive layouts fail at one doorway. That detail is easy to overlook. Allow movement gaps according to the panel system’s technical data, especially near humid bathrooms or heated rooms. Review lighting angles too, because side light can exaggerate small misalignments.
Tips: Create a full-height elevation for each connected wall. Use a laser level, not only a tape measure. Test one dry-fit panel near the transition. Check the sightline from the main entry. If the alignment looks awkward, revise the starting point before cutting. The American Institute of Architects’ home design research continues to show strong interest in flexible, connected living spaces. Wall panels should support that connection, not interrupt it. A small compromise at a hidden corner may produce a cleaner visual flow.
Moving wall panels between rooms starts with material compatibility, not decoration. Match moisture resistance, thickness, and movement before choosing a profile. PVC or compact laminate suits humid areas. Veneer and fiber panels need controlled indoor conditions. A 2-millimeter mismatch can create a visible step under grazing light. I have seen clean drawings fail because installers measured finished surfaces, not substrates.
Select profiles that manage movement without stealing attention. A shadow gap creates a deliberate break between different panel finishes. A T-profile supports equal-height panels, while an L-profile protects exposed edges at doors. Use flexible sealant at changing junctions. Rigid filler can crack when rooms experience different temperatures. The World Green Building Council’s 2019 report links buildings with 39% of global energy-related carbon emissions, so durable details matter beyond appearance. Replacing failed panels also consumes labor, transport, and new material.
Choose the transition method according to traffic and maintenance. A flush joint looks refined but demands precise cutting and stable backing. An overlap joint hides small errors, though it can collect dust. At bathrooms or utility spaces, seal the lower edge and keep water away from the substrate. The U.S. Environmental Protection Agency reported about 600 million tons of construction and demolition debris in 2018. That figure makes repairable transitions worth planning. Still, I would not overdesign every doorway. Sometimes a simple reveal is more honest, easier to inspect, and less likely to fail.
How to Transition Wall Panels Between Rooms?
A clean transition begins before the first panel is cut. Inspect both walls for loose paint, moisture stains, uneven framing, and proud fasteners. The U.S. Department of Energy reports that air leakage can represent 25–40% of home heating and cooling energy use. Seal gaps around wall openings before covering them. Use compatible backer material around outlets, doors, and service penetrations. A panel may hide a problem, but it will not correct one.
Measure each opening from finished floor level, not from the subfloor. This small detail prevents visible height differences between rooms. Leave the manufacturer’s recommended expansion gap at corners and door casings. Where two panels meet, keep their edges straight, clean, and fully supported. Lightly sand sharp edges, then remove dust with a dry cloth. The U.S. Environmental Protection Agency notes that indoor pollutant levels can be two to five times higher than outdoors, so ventilation and dust control matter during cutting and fitting.
Tips: Dry-fit every transition. Mark the room side. Cut slowly. Use a straightedge, and check the reveal from standing height. I sometimes rely too heavily on a laser level; it shows alignment, not whether the adjacent wall is visually pleasing. Recheck the opening after fastening. A narrow shadow line can look intentional, while an uneven gap usually looks accidental. Keep trim profiles consistent, but allow small corrections where older walls are not perfectly square.
How to Transition Wall Panels Between Rooms?
Install Panels Through Doorways and Room Connections
Wall panels should flow through doorways without looking forced. Measure the opening, wall thickness, and adjacent corners before cutting anything. A few extra minutes here can prevent a visible mismatch later. Mark a level reference line across both rooms. This line keeps panel joints aligned when the floors are slightly different.
At the doorway, continue the panel pattern as far as the frame allows. Leave the manufacturer’s required expansion gap around edges and cover it with suitable trim. Do not press panels tightly against the frame. Wood-based materials can move with humidity. For a clean connection, cut the final panel with a fine-tooth blade and test-fit it first. Keep the patterned face protected.
Room connections need careful planning. Start with the larger wall, then carry the layout into the smaller space. If the corner is uneven, scribe the panel instead of forcing it into place. I once rushed this step, and the joint opened near the baseboard. It looked minor at first. It became obvious under evening light. Small errors travel.
Check door swing clearance after installation. Confirm that outlets, switches, and vents remain accessible. Use compatible adhesive or fasteners for the wall surface, and follow the panel manufacturer’s installation guidance. In damp areas, seal exposed edges properly. A narrow transition trim may hide a difficult joint, but it should not compensate for inaccurate measurements. Real rooms are rarely square. Adjustments are normal.
Transitioning wall panels between rooms requires more than matching colors. A clean seam depends on accurate measurements, stable substrates, and careful planning around doorways. In my installation experience, I mark the panel layout before applying adhesive or fasteners. This reveals awkward joints near switches, baseboards, and uneven walls. Dry-fitting each panel helps confirm alignment. Leave a controlled expansion gap where temperature or humidity may change. A narrow gap is easier to conceal than a forced, bulging joint.
Tips: Use a straightedge across both rooms. Keep seam lines consistent. Label every cut panel before installation. Do not hide a poor measurement with excessive trim. It usually becomes more noticeable.
Inside and outside corners need different solutions. Inside corners can use a flexible sealant or a precisely cut return edge. Outside corners often need protective trim with a tight, even reveal. Press the trim gently, then check both faces from eye level. Surface transitions also deserve attention when panels meet painted drywall, tile, or textured finishes. A gradual trim profile can reduce shadows and prevent sharp height changes. Sanding or leveling may be necessary before installation. I have learned that “perfect” alignment is not always realistic on older walls. A small variation may remain. The goal is a deliberate, durable transition that looks intentional from normal viewing distance. Recheck the seams after the panels settle. Some movement appears later, not during installation.
| Transition Condition | Recommended Detail | Typical Joint or Gap | Substrate Preparation | Trim or Profile | Finish Approach | Key Installation Consideration | Suitability |
|---|---|---|---|---|---|---|---|
| Panel-to-panel seam on the same wall | Align the panel edges and create a controlled vertical or horizontal reveal. | Approximately 3–6 mm, subject to the panel manufacturer’s installation requirements. | Ensure the wall is flat, clean, dry, and structurally sound. Remove dust, loose paint, and surface contaminants. | Open reveal, matching joint strip, or paintable sealant joint. | Use a consistent joint width throughout the room. Tool sealant smoothly and remove excess before curing. | Keep seams away from high-impact locations where possible. Staggering joints can reduce visual concentration. | Recommended |
| Panel transition at an inside corner | Stop each panel cleanly at the corner or return one panel into the adjoining wall, depending on the design. | Maintain the panel system’s specified perimeter clearance; do not force panels tightly into the corner. | Check that the corner is plumb. Correct major irregularities before installation rather than bending rigid panels. | Inside-corner profile, flexible sealant, or a formed corner accessory compatible with the panel system. | Use a continuous line and consistent color at the corner to conceal minor movement. | Allow for building movement and thermal expansion, especially where panels have large dimensions. | Recommended |
| Panel transition at an outside corner | Protect the exposed edge with a dedicated corner profile or return the panel around the corner. | Use the profile manufacturer’s clearance requirements; maintain uniform reveals on both faces. | Verify that the corner is straight and securely backed. Add suitable blocking where mechanical fixing is required. | Outside-corner guard, metal profile, rigid PVC profile, or matching solid trim. | Use a factory-finished or painted profile for a crisp, impact-resistant edge. | Outside corners are vulnerable to impact; a protected edge is generally more durable than an untrimmed cut edge. | Usually Required |
| Transition through a doorway | Terminate the wall panels at the door lining or frame and continue the finish into the reveal where practical. | Leave the clearance required for the frame, movement, and sealant joint. | Confirm door-frame dimensions before cutting panels. Keep the opening square and protect the frame from adhesive or sealant. | Jamb trim, stop bead, edge profile, or paintable sealant at the frame-to-panel junction. | Align the panel layout with the door head or vertical jamb where possible for a balanced appearance. | Do not obstruct door hardware, weather seals, fire seals, or required clearances. | Detail Carefully |
| Transition from paneled wall to painted drywall | Create a straight termination line rather than feathering the panel edge into the drywall. | Typically a small controlled joint with flexible sealant or a concealed trim edge. | Make the drywall edge firm, smooth, dust-free, and fully dry. Repair damaged paper or compound before finishing. | End cap, L-profile, shadow gap, or paintable transition trim. | Paint the trim to match either the panel support color or the adjacent wall for a deliberate transition. | Differences in thickness should be resolved with trim or a properly prepared transition strip, not excessive sealant. | Recommended |
| Transition between panels of different thicknesses | Use a stepped transition, tapered transition strip, or purpose-made reducer profile. | Size the transition to cover the measured thickness difference without creating a sharp trip or impact edge. | Measure both finished surfaces after adhesive, battens, or backing layers are installed. | Reducer, ramped profile, stepped trim, or custom-fabricated transition piece. | Match the visible face of the thicker panel or use a contrasting profile as a design feature. | Do not rely on a thick bead of sealant to bridge a large level difference. | Required for Uneven Levels |
| Transition between smooth and textured surfaces | Separate the two surfaces with a clean trim line or intentional reveal. | Use a consistent joint sized for the selected profile or sealant system. | Remove texture from the bonding zone where required. Ensure both surfaces are compatible with the adhesive or fixing method. | Divider strip, shadow-gap profile, edge molding, or narrow reveal. | Keep texture from contaminating the smooth surface. Mask adjacent areas during sealant and paint work. | A trim line usually provides a cleaner result than attempting to blend dissimilar surface textures. | Recommended |
| Transition at a floor or baseboard | End the panel above the finished floor or coordinate it with the baseboard system. | Maintain the flooring manufacturer’s perimeter clearance and avoid direct contact with standing moisture. | Install flooring and base layers according to the planned sequence. Keep the lower wall edge straight and protected. | Baseboard, cove base, sanitary trim, bottom channel, or moisture-resistant sealant where appropriate. | Use a continuous base detail to hide the lower edge and simplify cleaning. | Do not trap moisture behind the panel. Wet-area details require a compatible waterproofing and sealing strategy. | Required at Floor Line |
| Transition at a ceiling or soffit | Terminate the panel with a straight top edge and coordinate it with the ceiling finish. | Provide the movement and installation clearance specified for the panel system. | Confirm the ceiling line is level and locate framing or backing before fixing top trims. | Top cap, shadow-gap profile, cornice, flat trim, or flexible sealant joint. | A shadow gap can conceal minor ceiling irregularities while creating a deliberate visual separation. | Plan around ceiling access panels, sprinklers, lighting, air diffusers, and required service clearances. | Recommended |
| Transition around a column or structural projection | Use segmented panels, a formed wrap, or a framed transition with protected external edges. | Divide the detail into planned joints rather than forcing one large panel around a tight radius. | Verify the column dimensions and plumbness. Install backing or furring where the substrate cannot accept the selected fixing. | Flexible corner profile, multi-part trim, reveal system, or custom-fabricated wrap detail. | Center seams on the projection or align them with the room’s principal sight lines. | Respect structural movement joints; do not bridge a movement joint with rigid finishes unless the system is designed for it. | Detail-Specific |
| Transition across a building movement joint | Use a movement-joint cover or a tested flexible joint assembly designed for the expected movement. | Joint width and movement capacity must be based on the building joint design, not on appearance alone. | Keep the movement joint clear and follow the project’s structural and waterproofing requirements. | Flexible movement profile, bellows cover, or two-part joint trim. | Keep the joint visually consistent while allowing independent movement on both sides. | Never bridge a structural or seismic joint with rigid adhesive, rigid trim, or hard filler. | Do Not Bridge Rigidly |
| Transition at a wet-area boundary | Use a sealed termination that integrates with the room’s waterproofing and wet-area detailing. | Follow the waterproofing system and panel manufacturer’s specified joint dimensions. | Substrate must be sound, clean, dry where required, and compatible with the waterproofing and adhesive systems. | Water-resistant end cap, cove trim, internal corner profile, or compatible sanitary sealant. | Seal penetrations and changes of plane continuously. Use only products approved for the intended exposure. | Decorative trim alone does not replace a continuous waterproofing system behind or beneath the finish. | Waterproofing Required |
| General guidance: Final joint sizes, adhesive selection, fixing spacing, movement allowances, fire performance, moisture resistance, and trim compatibility must be verified against the specific wall-panel system, substrate, room conditions, and applicable building requirements. | |||||||
Check for loose paint, moisture stains, uneven framing, and raised fasteners. Repair these issues first. A panel hides problems, but does not fix them.
Seal gaps around outlets, doors, and service penetrations. This reduces drafts and prevents visible air paths behind the panels.
Measure from the finished floor, not the subfloor. This helps keep panel heights consistent between rooms.
Keep edges straight, clean, and fully supported. Lightly sand sharp edges, then remove dust with a dry cloth.
Yes. Dry-fit every transition and label each cut panel. This reveals awkward joints near switches, baseboards, and uneven walls.
Follow the recommended gap at corners and door casings. A narrow controlled gap looks better than a forced, bulging joint.
Use flexible sealant or a precise return edge inside corners. Outside corners usually need protective trim with an even reveal.
Use a gradual trim profile to reduce shadows and sharp height changes. Sanding or leveling may be necessary beforehand.
View the seam from standing height and eye level. A laser confirms alignment, but not whether the wall looks pleasing.
Panels can shift after settling, especially in changing conditions. Recheck seams later. I sometimes trust perfect alignment too much; older walls rarely cooperate.
Learning how to transition wall panels between rooms starts with careful planning. Assess the panel layout in each space, noting wall dimensions, doorways, corners, ceiling heights, and sightlines so the design flows naturally from one room to the next. Choose compatible materials, profiles, and transition methods based on panel thickness, surface texture, moisture conditions, and the desired visual effect. A consistent alignment can create continuity, while a deliberate change in direction, color, or profile can clearly define separate areas.
Before installation, prepare the walls, openings, and panel edges by ensuring surfaces are clean, level, and properly supported. Install panels through doorways and connecting areas with accurate measurements, allowing suitable expansion gaps where needed. Pay close attention to seams, inside and outside corners, trim, and changes between different surfaces. Thoughtful finishing work conceals joints, protects exposed edges, and creates a smooth, durable transition. These practical steps explain How to transition wall panels between rooms while maintaining both function and visual balance.
